Step 1. 설치 환경 갖추기
https://github.com/kubeflow/manifests
GitHub - kubeflow/manifests: A repository for Kustomize manifests
A repository for Kustomize manifests. Contribute to kubeflow/manifests development by creating an account on GitHub.
github.com
위 사이트에 들어가면 사전에 설치해야할 목록이 있다
정리해보면,
쿠버네티스 1.25 버전 (StorageClass 설치), kustomize 5.0.0 버전
버전이 다르면 설치가 되지 않으니 꼭 지킬것!!!
쿠버네티스는 설치했다고 가정하고 다음 step 부터 진행
Step 2. StorageClass 설치
쿠버네티스에 default StorgaeClass가 없어서 수동으로 설치해줘야한다
2-1. Install LVM
sudo apt-get install -y lvm22-2. Install Rook
git clone --single-branch --branch v1.11.1 https://github.com/rook/rook.git

cd rook/deploy/examples
kubectl create -f crds.yaml -f common.yaml -f operator.yaml

kubectl create -f cluster.yaml

kubectl get CephCluster -n rook-ceph
2-3. StorageClass 생성 및 default로 설정
# /Rook/deploy/examples/csi/rbd

kubectl apply -f storageclass-test.yaml

kubectl patch sc rook-ceph-block -p '{"metadata": {"annotations":{"storageclass.kubernetes.io/is-default-class":"true"}}}'
Error: rook-ceph-mon pod 에러
  Warning  FailedScheduling  65s   default-scheduler
  0/3 nodes are available: 1 node(s) had untolerated taint {node-role.kubernetes.io/control-plane: },
  2 node(s) didn't match pod anti-affinity rules. preemption: 0/3 nodes are available:
  1 Preemption is not helpful for scheduling, 2 node(s) didn't match pod anti-affinity rules.


  #taint 있는 노드 확인
  kubectl get nodes -o custom-columns=NAME:.metadata.name,TAINTS:.spec.taints

  #untaint

  kubectl taint nodes 해당 노드 node-role.kubernetes.io/control-plane:NoSchedule-
Step 3. kustomize 설치
kustomize는 꼭 5.0.0 버전을 사용해야 한다
wget https://github.com/kubernetes-sigs/kustomize/releases/download/kustomize%2Fv5.0.1/kustomize_v5.0.1_linux_amd64.tar.gz

tar -xvf kustomize_v5.0.1_linux_amd64.tar.gz

mv kustomize /usr/local/bin
Step 4. Kubeflow 설치
mkdir kubeflow
cd kubeflow
git clone https://github.com/kubeflow/manifests.git
cd manifests
컴포넌트들을 하나 하나 지정해서 설치하는 방법도 있지만 귀찮기 때문에 명령어 한 줄로 다 설치하겠다
while ! kustomize build example | awk '!/well-defined/' | kubectl apply -f -; do echo "Retrying to apply resources"; sleep 10; done명령어 실행 중 오류가 발생하는데 계속 냅두면 알아서 사라진다 (다운로드가 너무 빨리돼서 발생하는 문제인듯)
Step 5. PV 생성해주기
StorageClass의 오류덕분에 자동으로 PV가 생성이 되지않았다. 따라서 수동으로 생성하겠다
연결해야 할 PVC는 총 4개이고 메모리 요구량은 각각 20Gi, 20Gi, 10Gi, 10Gi이다
apiVersion: v1
kind: PersistentVolume
metadata:
  name: pv1
spec:
  storageClassName: rook-ceph-block
  capacity:
    storage: 10Gi
  accessModes:
    - ReadWriteOnce
  hostPath:
    path: "/tmp/pv1"
PV를 생성해주면 쿠버네티스가 알아서 PVC와 연결해준다

Step 6. authservice-0 오류 해결하기
authservice-0 pod가 생성이 안되길래 log를 확인해 보니 open /var/lib/authservice/data.db: permission denied 오류가 발생했다.
authservice statefulset의 내용을 수정하자
kubectl edit statefulset -n istio-system authservice

#spec: 밑에 추가
initContainers:
  - name: fix-permission
    image: busybox
    command: ['sh', '-c']
    args: ['chmod -R 777 /var/lib/authservice;']
    volumeMounts:
    - mountPath: /var/lib/authservice
      name: data
Step 7. Kubeflow dashboard 접속하기
7-1. pod 상태 확인
아래 명령어를 쳤을 때 나오는 pod가 다 running 상태여야 한다.
kubectl get pods -n cert-manager
kubectl get pods -n istio-system
kubectl get pods -n auth
kubectl get pods -n knative-eventing
kubectl get pods -n knative-serving
kubectl get pods -n kubeflow
kubectl get pods -n kubeflow-user-example-com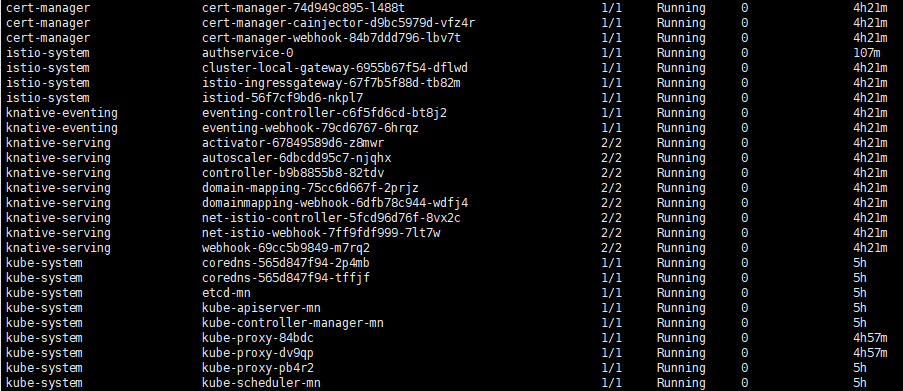
7-2. Port-Forward
kubectl port-forward svc/istio-ingressgateway -n istio-system 8080:80http://localhost:8080으로 접속하면 Dex 로그인 창이 뜨고 ID는 user@example.com PWD는 12341234 이다!!
StorageClass 설치와 authservice 에러 해결은 아래 사이트들을 참고했다
https://mydailylogs.tistory.com/85
'DKE > Kubernetes' 카테고리의 다른 글
| [Kubernetes] local-path-storage 설치하기 / 2023.06.15 (0) | 2023.06.15 |
|---|---|
| [Kubeflow] 계정(User) 추가하기 / 2023.06.14 (0) | 2023.06.14 |
| [Kubeflow] ERROR [403] poddefaults.kubeflow.org is forbidden / 2023.06.14 (0) | 2023.06.14 |
| Kubernetes 설치하기 (Ubuntu 20.04) / 2023.06.06 (0) | 2023.06.06 |
| Docker 설치하기 (Ubuntu 20.04) / 2023.06.05 (0) | 2023.06.05 |


